Technical Specifications


Volumetric Accuracy
0.025 mm
(0.0009 in)
0.025 mm
(0.0009 in)
Volumetric accuracy
9.1 m3 (320 ft3)
9.1 m3 (320 ft3)
0.064 mm
(0.0025 in)
0.064 mm
(0.0025 in)
Volumetric accuracy
16.6 m3 (586 ft3)
16.6 m3 (586 ft3)
0.078 mm
(0.0031 in)
0.078 mm
(0.0031 in)
Automatic Volume Extension accuracy(1)
0.025 mm + 0.015 mm/m
(0.0009 in + 0.00018 in/ft)
0.025 mm + 0.015 mm/m
(0.0009 in + 0.00018 in/ft)
Form error (Sphere)
0.025 mm
(0.0009 in)
0.025 mm
(0.0009 in)
Form error (Flat)
0.045 mm
(0.0018 in)
0.045 mm
(0.0018 in)
Acceptance test
Based on VDI/VDE 2634 part 3
and ISO 10360
Based on VDI/VDE 2634 part 3
and ISO 10360
Measurement capabilities
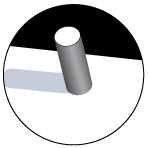
 Pin
Pin0.750 mm
(0.0295 in)
0.500 mm
(0.0197 in)
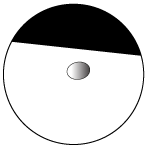
 Hole
Hole1.250 mm
(0.0394 in)
0.750 mm
(0.0295 in)
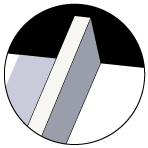
 Step
Step0.025 mm
(0.0009 in)
0.015 mm
(0.0006 in)
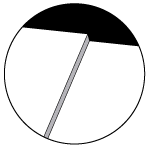
 Wall
Wall0.500 mm
(0.0197 in)
0.500 mm
(0.0197 in)
Measurement resolution
0.025 mm
(0.0009 in)
0.015 mm
(0.0006 in)
Mesh resolution
0.100 mm
(0.0039 in)
0.050 mm
(0.0018 in)
Measurement rate
1,800,000 measurements/s
3,000,000 measurements/s
45 blue laser lines
69 blue laser lines
Scanning area
310 x 350 mm
(12.2 x 13.8 in)
170 x 190 mm
(6.7 x 7.5 in)
Stand-off distance
300 mm
(11.8 in)
300 mm
(11.8 in)
Depth of field
250 mm
(9.8 in)
100 mm
(3.9 in)
Setup Assistance tools(4)
Included
Included
Weight
Scanner: 2.91 kg (6.41 lbs)
Scanner + Calibration bar: 4.26 kg (9.39 lbs)
C-Track: 5.7 kg (12.5 lbs)
Scanner: 2.91 kg (6.41 lbs)
Scanner + Calibration bar: 4.26 kg (9.39 lbs)
C-Track: 5.7 kg (12.5 lbs)
Inertia Limit
J6: 0.221 Kg-m2 (5.24 lb-ft2)
J6: 2.250 Kgf-cm-s2 (1.95 lbf-in-s2)
J6: 0.221 Kg-m2 (5.24 lb-ft2)
J6: 2.250 Kgf-cm-s2 (1.95 lbf-in-s2)
Dimensions
(LxWxH)
(LxWxH)
Scanner: 289 x 235 x 296 mm (11.4 x 9.3 x 11.7 in)
C-Track: 1031 x 181 x 148 mm (40.6 x 7.1 x 5.8 in)
Scanner: 289 x 235 x 296 mm (11.4 x 9.3 x 11.7 in)
C-Track: 1031 x 181 x 148 mm (40.6 x 7.1 x 5.8 in)
Operating temperature range
5-40 °C
(41-104 °F)
5-40 °C
(41-104 °F)
Operating humidity range
(non-condensing)
(non-condensing)
10-90%
10-90%
Certifications
EC Compliance (Electromagnetic Compatibility Directive, Low Voltage Directive), compatible with rechargeable batteries (when applicable), IP50, WEEE
EC Compliance (Electromagnetic Compatibility Directive, Low Voltage Directive), compatible with rechargeable batteries (when applicable), IP50, WEEE
Patents
US 10,271,039, JP 6,596,433, CA 2,938,104, KR 10-2424135, EP (FR, UK, DE) 3,102,908, CA 3,166,558
US 10,271,039, JP 6,596,433, CA 2,938,104, KR 10-2424135, EP (FR, UK, DE) 3,102,908, CA 3,166,558
(1) The volumetric accuracy performance of the system when using the Automatic Volumetric Extension cannot be superior to the default volumetric accuracy performance for a given model.
(2) Performance tests done in Creaform's ISO/IEC 17025 accredited calibration laboratories.
(3) Laser class: 2M (eye safe).
(4) The Setup Assistance tools enable visual guidances and advanced diagnostics for part and jigs setups.
Dimensions
(LxWxH)
(LxWxH)
- Light curtain
- Mesh and light curtain
Max. part size
Max. part weight
Opening width
Creaform’s worldwide support, repair, and calibration metrology centres
Creaform’s metrology centres are located around the world and offer the following services* in different languages:
Ask our experts
24/7 support for the MetraSCAN 3D-R and CUBE-R
Software technical support helpline
3D scanner basic and advanced repair
Equipment maintenance, tuning and calibration
Loaner services
3D scanner component replacement
Warranty renewal
Developed using rigorous manufacturing processes
Creaform designs, manufactures, and calibrates the MetraSCAN 3D-R with the most sophisticated quality management system and according to internationally recognized standards, the ISO 9001 and ISO 17025.
The MetraSCAN 3D-R’s acceptance test is based on VDI\VDE 2634 and conducted in an ISO 17025 accredited laboratory to guarantee traceability aligned with international standards.
Each MetraSCAN 3D-R is delivered with a personalized certification and fully documented test results.
Product and support based on international metrology standards
At Creaform, product and service quality is our top priority. Being pioneers in portable 3D measurement technologies, we are committed to exceeding our customer requirements by developing innovative solutions.
We are invested in continuously improving processes, setting new standards for the industry and ensuring full satisfaction of our clientele.
Achieve a new level in automated quality control.
Accelerate your implementation of automated quality control with Creaform’s R-Series solutions


