Technical Specifications
Innovating technology that provides accuracy, simplicity, portability as well as real speed to your metrology-grade applications.


Volumetric Accuracy
Up to 0.040 mm
(0.0016 in)
0.035 mm
(0.0014 in)
0.025 mm
(0.0009 in)
Volumetric accuracy
9.1 m3 (320 ft3)
9.1 m3 (320 ft3)
0.086 mm
(0.0034 in)
0.086 mm
(0.0034 in)
0.064 mm
(0.0025 in)
Volumetric accuracy
16.6 m3 (586 ft3)
16.6 m3 (586 ft3)
0.122 mm
(0.0048 in)
0.122 mm
(0.0048 in)
0.078 mm
(0.0031 in)
Automatic Volume Extension accuracy(1)
N/A
0.035 mm + 0.020 mm/m
(0.0014 in + 0.00024 in/ft)
0.025 mm + 0.015 mm/m
(0.0009 in + 0.00018 in/ft)
Form error (Sphere)
N/A
0.035 mm
(0.0014 in)
0.025 mm
(0.0009 in)
Form error (Flat)
N/A
0.060 mm
(0.0024 in)
0.045 mm
(0.0018 in)
Probing accuracy with HandyPROBE Next+
0.030 mm
(0.0012 in)
0.030 mm
(0.0012 in)
0.025 mm
(0.0009 in)
Acceptance test
N/A
Based on VDI/VDE 2634 part 3
and ISO 10360
Based on VDI/VDE 2634 part 3
and ISO 10360
Measurement capabilities (at a working distance of 0.3 m (1 ft))
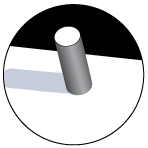
 Pin
Pin1.750 mm
(0.0689 in)
0.750 mm
(0.0295 in)
0.750 mm
(0.0295 in)
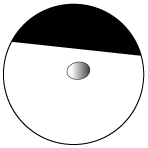
 Hole
Hole1.750 mm
(0.0689 in)
1.250 mm
(0.0394 in)
1.250 mm
(0.0394 in)
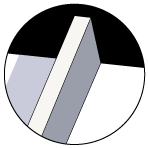
 Step
Step0.035 mm
(0.0014 in)
0.025 mm
(0.0009 in)
0.025 mm
(0.0009 in)
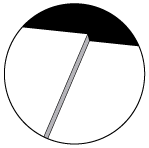
 Wall
Wall1.000 mm
(0.0394 in)
0.500 mm
(0.0197 in)
0.500 mm
(0.0197 in)
Measurement resolution
0.100 mm
(0.0039 in)
0.025 mm
(0.0009 in)
0.025 mm
(0.0009 in)
Mesh resolution
0.200 mm
(0.0078 in)
0.100 mm
(0.0039 in)
0.100 mm
(0.0039 in)
Measurement rate
480,000 measurements/s
1,800,000 measurements/s
1,800,000 measurements/s
14 red laser lines
30 blue laser lines
(+ 1 extra line)
30 blue laser lines
(+ 1 extra line)
Scanning area
275 x 250 mm
(10.8 x 9.8 in)
310 x 350 mm
(12.2 x 13.8 in)
310 x 350 mm
(12.2 x 13.8 in)
Stand-off distance
300 mm
(11.8 in)
300 mm
(11.8 in)
300 mm
(11.8 in)
Depth of field
200 mm
(7.9 in)
250 mm
(9.8 in)
250 mm
(9.8 in)
Part size range (recommended)
0.2–6 m (0.7–20 ft)
0.2–6 m (0.7–20 ft)
0.2–6 m (0.7–20 ft)
Setup Assistance tools(4)
N/A
N/A
Included
Software
VXelements
VXelements
VXelements
Output formats
.dae, .fbx, .ma, .obj, .ply, .stl, .txt, .wrl, .x3d, .x3dz, .zpr, .3mf
.dae, .fbx, .ma, .obj, .ply, .stl, .txt, .wrl, .x3d, .x3dz, .zpr, .3mf
.dae, .fbx, .ma, .obj, .ply, .stl, .txt, .wrl, .x3d, .x3dz, .zpr, .3mf
Compatible software
3D Systems (Geomagic® Solutions), InnovMetric Software (PolyWorks), Metrologic Group (Metrolog X4), New River Kinematics (Spatial Analyzer), Verisurf, Dassault Systèmes (CATIA V5, SOLIDWORKS), PTC (Creo), Siemens (NX, Solid Edge), Autodesk (Inventor, PowerINSPECT)
3D Systems (Geomagic® Solutions), InnovMetric Software (PolyWorks), Metrologic Group (Metrolog X4), New River Kinematics (Spatial Analyzer), Verisurf, Dassault Systèmes (CATIA V5, SOLIDWORKS), PTC (Creo), Siemens (NX, Solid Edge), Autodesk (Inventor, PowerINSPECT)
3D Systems (Geomagic® Solutions), InnovMetric Software (PolyWorks), Metrologic Group (Metrolog X4), New River Kinematics (Spatial Analyzer), Verisurf, Dassault Systèmes (CATIA V5, SOLIDWORKS), PTC (Creo), Siemens (NX, Solid Edge), Autodesk (Inventor, PowerINSPECT)
Weight
Scanner: 1.38 kg (3.0 lb)
Probe: 0.5 kg (1.1 lb)
C-Track: 5.7 kg (12.5 lb)
Scanner: 1.49 kg (3.28 lb)
Probe: 0.5 kg (1.1 lb)
C-Track: 5.7 kg (12.5 lb)
Scanner: 1.49 kg (3.28 lb)
Probe: 0.5 kg (1.1 lb)
C-Track: 5.7 kg (12.5 lb)
Dimensions
(LxWxH)
(LxWxH)
Scanner: 289 x 235 x 296 mm (11.4 x 9.3 x 11.7 in)
Probe: 68 x 157 x 340 mm (2.7 x 6.2 x 13.4 in)
C-Track: 1031 x 181 x 148 mm (40.6 x 7.1 x 5.8 in)
Scanner: 289 x 235 x 296 mm (11.4 x 9.3 x 11.7 in)
Probe: 68 x 157 x 340 mm (2.7 x 6.2 x 13.4 in)
C-Track: 1031 x 181 x 148 mm (40.6 x 7.1 x 5.8 in)
Scanner: 289 x 235 x 296 mm (11.4 x 9.3 x 11.7 in)
Probe: 68 x 157 x 340 mm (2.7 x 6.2 x 13.4 in)
C-Track: 1031 x 181 x 148 mm (40.6 x 7.1 x 5.8 in)
Operating temperature range
5-40 °C
(41-104 °F)
5-40 °C
(41-104 °F)
5-40 °C
(41-104 °F)
Operating humidity range
(non-condensing)
(non-condensing)
10-90%
10-90%
10-90%
Certifications
EC Compliance (Electromagnetic Compatibility Directive, Low Voltage Directive), compatible with rechargeable batteries (when applicable), IP50, WEEE
EC Compliance (Electromagnetic Compatibility Directive, Low Voltage Directive), compatible with rechargeable batteries (when applicable), IP50, WEEE
EC Compliance (Electromagnetic Compatibility Directive, Low Voltage Directive), compatible with rechargeable batteries (when applicable), IP50, WEEE
Patents
US 10,271,039, JP 6,596,433, CA 2,938,104, KR 10-2424135, EP (FR, UK, DE) 3,102,908, CA 3,166,558
US 10,271,039, JP 6,596,433, CA 2,938,104, KR 10-2424135, EP (FR, UK, DE) 3,102,908, CA 3,166,558
US 10,271,039, JP 6,596,433, CA 2,938,104, KR 10-2424135, EP (FR, UK, DE) 3,102,908, CA 3,166,558
(1) The volumetric accuracy performance of the system when using the Automatic Volumetric Extension cannot be superior to the default volumetric accuracy performance for a given model.
(2) Performance tests done in Creaform's ISO/IEC 17025 accredited calibration laboratories.
(3) Laser class: 2M (eye safe).
(4) The Setup Assistance tools enable visual guidance and advanced diagnostics for part and jigs setups.
(5) Also compatible with all major metrology, CAD, and computer graphic software through mesh and point cloud import.
Creaform’s worldwide support, repair, and calibration metrology centres
Creaform’s metrology centres are located around the world and offer the following services* in different languages:
Ask our experts
Software and hardware technical support helpline
3D scanner basic and advanced repair
Equipment maintenance, tuning and calibration
Loaner services
3D scanner component replacement
Parts reselling
Warranty renewal
Developed using rigorous manufacturing processes
Creaform designs, manufactures, and calibrates the MetraSCAN 3D with the most sophisticated quality management system and according to internationally recognized standards, the ISO 9001 and ISO 17025.
The MetraSCAN 3D’s acceptance test are based on VDI\VDE 2634, which is ISO 17025 accredited to guarantee traceability aligned with international standards.
Each MetraSCAN 3D is delivered with a personalized certification and fully documented test results.
Product and support based on international metrology standards
At Creaform, product and service quality is our top priority. Being pioneers in portable 3D measurement technologies, we are committed to exceeding our customer requirements by developing innovative solutions.
We are invested in continuously improving processes, setting new standards for the industry and ensuring full satisfaction of our clientele.
Interested in learning more about the MetraSCAN 3D?
Our metrology experts can help you identify your needs and show you how the MetraSCAN 3D can accelerate your quality control—all while boosting your operational efficiency and cutting QC costs.


